Now this is the story all about how
My life got flipped, turned upside down
And I'd like to take a minute just sit right there
I'll tell you how we built the body of the car
I think i'm going a bit odd from writing all this blog in one hit.......
Now the plan was to make some small modifications to the the existing bodywork we had. This was somewhat thwarted by Mr Watson hitching a ride on my roof at Mallory, then using my bonnet as crash matt, so decided to start by mounting the rear tub and front nose and trying to join them up whilst actively looking for a replacement. That was the plan anyway, but as you will see as we progress, everything got a little more involved......
As luck would have it Marc had an old chassis we could use to build the body around, this would ensure everything fitted and the wheel arches were all in the right places. We picked the chassis up from Mallory then set about mounting it to a dolly with a simulated ride height and flat floor to start building up from.
So with the chassis fitted to the dolly we started to mount up what we could and work out the lines and height of everything, including the clearances required between the wheels. We used a salvageable part of the bonnet to get the front started.
We wanted to use MDF to create the buck panels where possible, but we didn't want the car to be square and flat sided, so in usual Greenway style we started adding bends. By creating the side panels out of several pieces of MDF, bent in in different plains to each other we started to create "swooping" lines from flat pieces of MDF bent in a single direction (i.e. it impossible to bend anything in 2 or more plains)
The lower part of the sill is a piece of baton, with lots of slits cut it to allow it to bend, this is then screwed to the floor and a piece of MDF screwed to the top to make the horizontal surface. This is then radius's using a router. This is the same sort of process used to create all the bends and hold everything together. The top surface you can see is a length of MDF we were holding in position to create a curve for the upper surface part of the body, we could then mark this on the upper part of the sill to cut it to shape.
And now the upper side of the sill in place
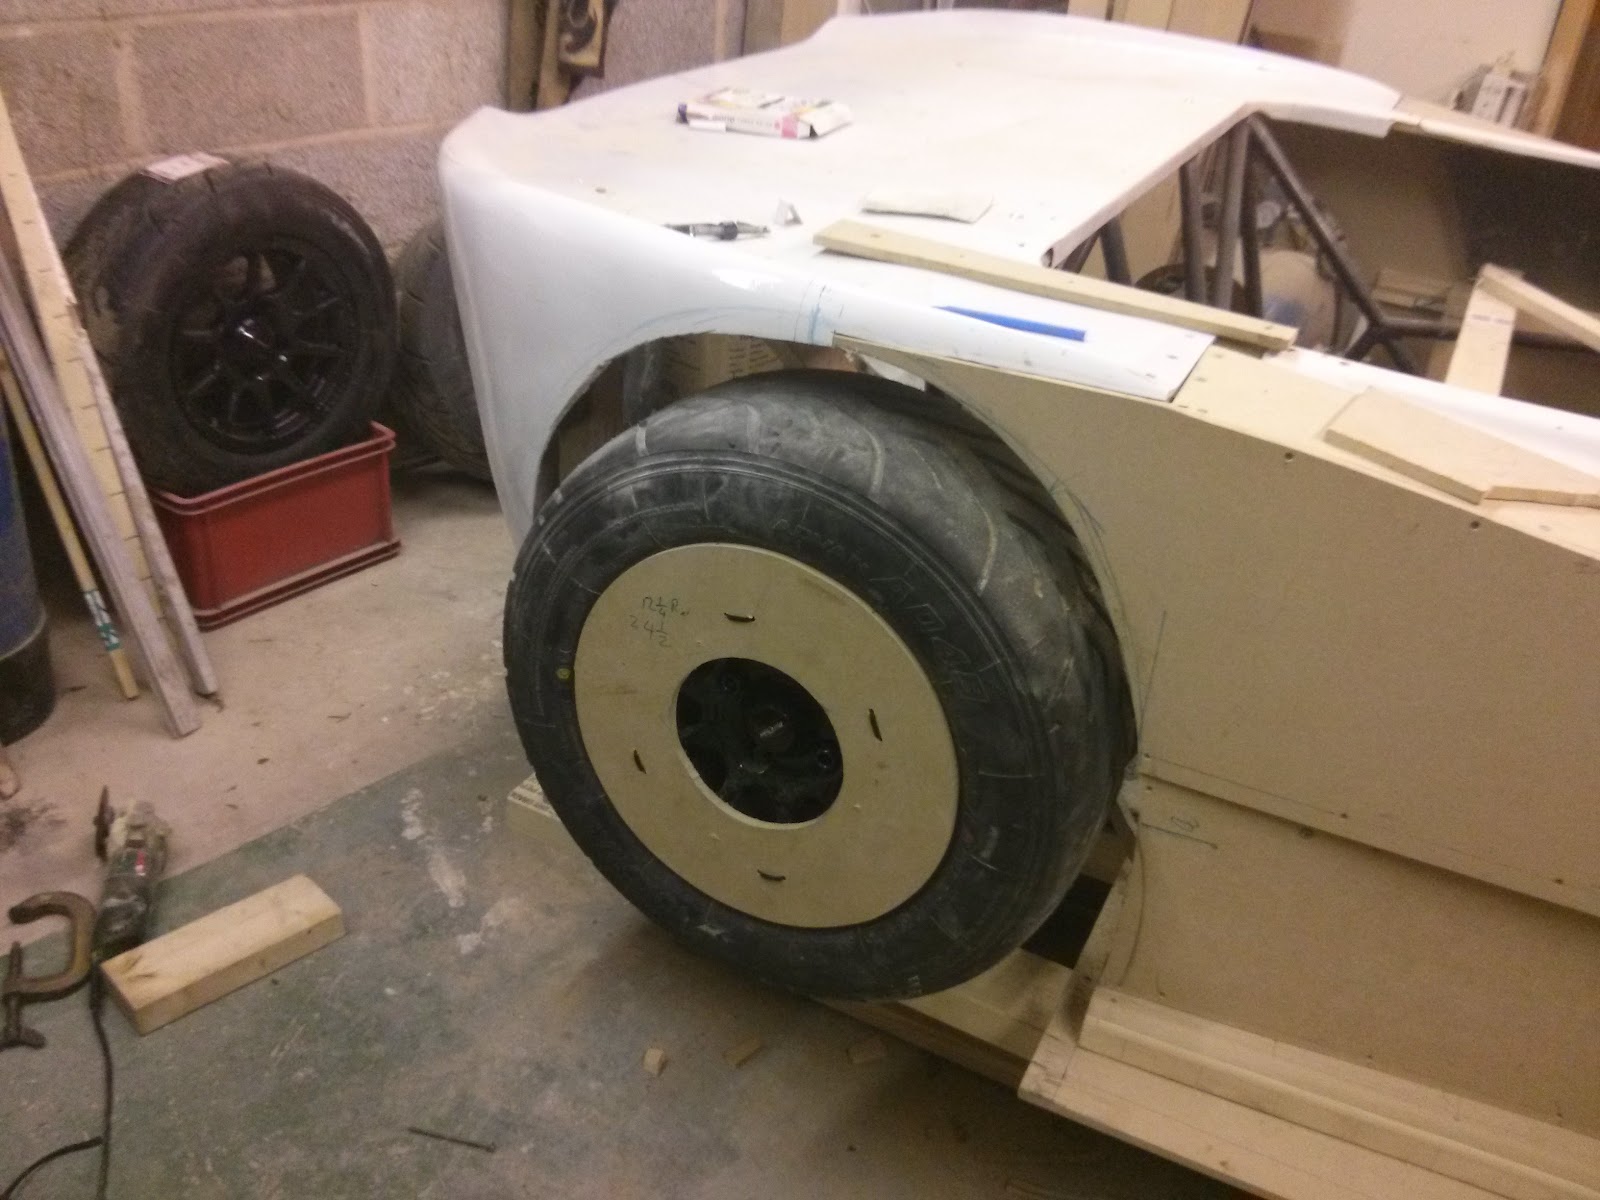
We now had to create a front wing, initially we thought we could use the old bonnet, but it was coming evident that this wasn't going to work due to the width and shape of everything. We worked out how high the wheel would come in full compression and set this as the top surface for the bodywork, we then created a former with a radius equal to the top of this surface and the wheel centre at normal ride height. Using this former we stuck 2 pieces of MDF together to create the wheel arch curve shown below, this was blended into the existing nose we had from the old Fury.


We had always wanted some kind of flared wheel arch, this was partly down to trying to use the exiting body work, but also we didn't want a slab sided car, and the flared DTM style arches always look great IMO. To make this easier we decide to set the the inner and outer edges of the flares using a known and set radius made from MDF discs, we could then fill inbetween these with foam and filler and have a guide to get a smooth, equal radius. we also used this to ensure the wheel fitted inside the arches.
With the outer disc set we covered the gap in tape and piled expanding foam in from behind
Then dug out some of the filler and applied lots of bridge filler, ensuring you can run a straight edge between the inner and outer radius's, this will allow us to apply softer body filler to rub down smooth.
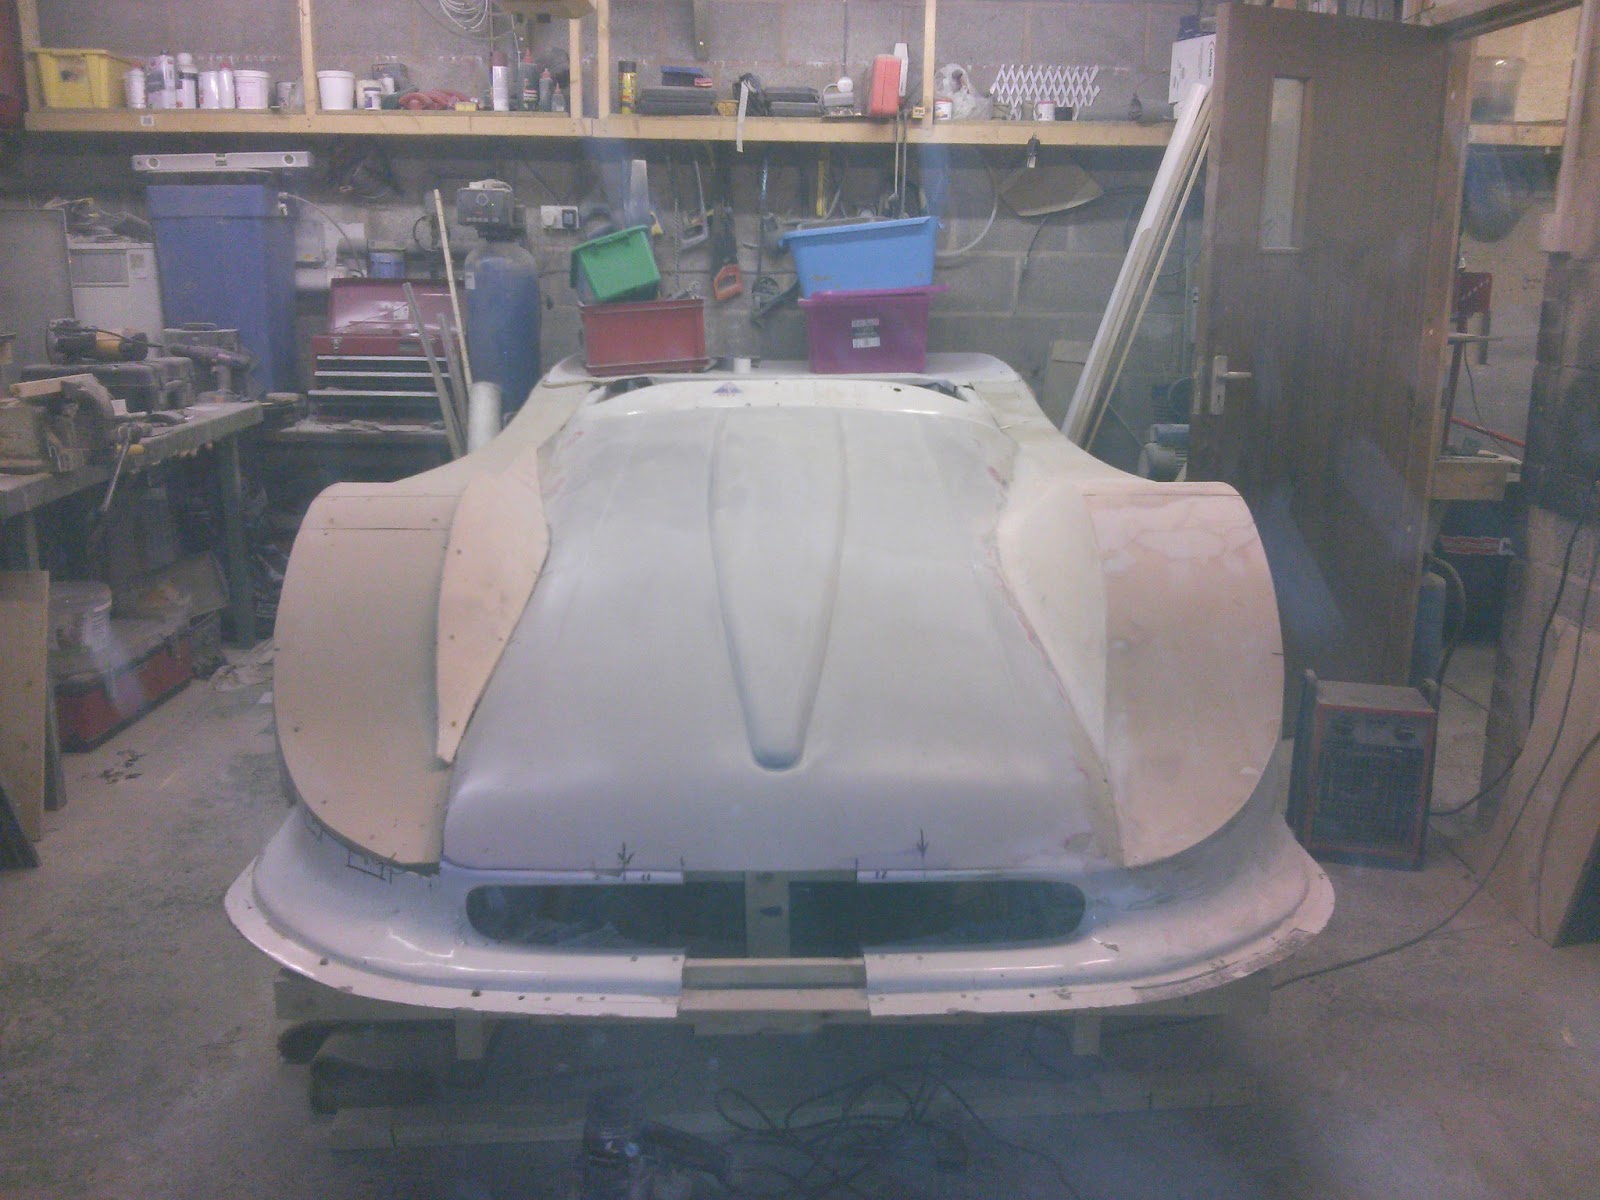
With that complete we decided to mirror it all onto the otherside. We did this by making copies of each MDF panel then turning them over, checking and measuring to ensure everything was symmetrical. You can see how much wider the car is than the fury, we had to split the nose in half and cap it by the amount shown in the picture!! We are slowly losing all the old panels!!!
As we knew the size of the arches required, it was easier to create the disc to create the arches off the car and then just mount them in the correct position, making sure everything was equal and squared up. You can see the way they are constructed in the later photos.
Next hurdle was the bonnet, we had nothing we could use from the old car, even if the old bonnet had survived it was too narrow and the wrong shape now any way. We wanted something with a compound curve so could bend anything, we didn't want to to rubbing foam down, trying to make it symmetrical. Another car bonnet was an idea we both liked but there wasn't any long enough or the right shape, but dad had a cunning plan, although was sceptical again. A van roof, but it had to be a roof without a join along the top side edges like most modern vans. Our friend John Bentley came up with the perfect donor, Daihatsu Hi jet. A what i hear you say, maybe if i called it a "sooty van" you would know what i mean?? Anyway after a quick search on ebay i found a couple locally, the first of which was in a scrap yard in the ar$ehole of inner city Birmingham. On the phone it was described as having a good roof, upon arrival it had obviously had other cars stacked on its roof in the scrap yard, so was of no use what so ever!! Luckily plan B was only a few miles away, and it was indoors and in good nick!!

30 mins fun with dads favourite tool, the angle grinder....
And when we got home we dropped it ontop of the car and started to wonder what on earth we were going to do
I wasn't convinced we could make it work, and dad wasn't looking too convinced either, but after some more quality angle grinding time we cleared a space
And created a former at the scuttle end to flare the roof/bonnet outwards
Once we were certain the bonnet would clear the chassis we had some more quality time with the angle grinder removing the chassis to help lighten the buck up so we can move it one day
I have some photos missing now, but once we had the bonnet roughly in place, we decided (well i already knew) that the head light area was all wrong, and i wanted to change the area to be more like an LMP car. Below Dad is holding the length of wood in about the position we wanted the headlight area to go.
So making formers again we made our best bit of curvey sweepyness to date
And then mounted on the car
The closing panel between the bonnet and the arch is created by forcing a piece of ply between mounting blocks on the bonnet and the upper wheelarch/bodywork, allowing it to form its own curves, which came out far better than i had ever imagined. You will also notice down the centre of the bonnet a new feature, this again was made by glue 2 pieces of MDF together to form the shape to th ebonnet (i wiont call it a roof anymore), this will help strengthen everything up but also adds a visual line to break up the plane long looking nose.
We now hd to copy it all over to the other hand
And then fill and blend all the corners in
And join the middle up, including a strengthener in the middle of the grill
During this time we also added the rear wheel arches, but i dont seem to have any pictures of us doing this, but it was done in exactly the same way as the fronts.
You may also have noticed the scuttle has changed colour, we ended up casting a new part of the exiting tub which was mounted as we needed it back so the old car can race again. Also when we did this we ended up reshaping it all as the fury one was all over the place.
With the basics all being there we decided it was time to get it out in the daylight for longer distant shots
After looking at these shots, and thinking we may have a slight issue with an imbalance between front and rear down force, we have raised the rear deck by about 25mm, we have a plan on how to make it adjustable anyway if it turns out not to be correctly balance.
With just the rear corners to finish the major design on we feel like we are on the homeward stretch, but there are still many many more hours of filling and smoothing before its ready for the mould makers.
A big thanks to Dad who has spent 100's of hours on this so far!!! This blog has only glossed over all the work and effort gone into getting it to this stage!


